Repair
How to repair a broken Zipper® ?
HOW TO REPAIR A BROKEN ZIPPER ?
Your zipper® is broken. You've been searching the Internet for a zipper repair but are lost in the flood of information? Here's a guide to help you identify the broken part, find out if it's repairable and if so, choose the right repair.
UNDERSTAND THE MECHANISM OF A ZIPPER
With the help of a slider, the teeth of the zipper engage or disengage from each other. The teeth visible on the outside of the zipper are used to guide the slider and the fastening is done by the small teeth visible on the inside of the cursor. These small teeth lock together, creating a firm pressure. So with each closing, the teeth interlock. And each time you open it, the teeth come off.
TAKING CARE OF THE ZIPPER IS A SIMPLE BUT NECESSARY TASK
An obvious but important detail, make sure it is clean and free of any objects (sand, gravel, twigs, mud, etc.) that could cause a poor seal or damage the closure. The outer teeth and the entire closure should be kept clean and free of dirt.
Before you can even begin to repair a broken zipper, you need to determine which part of the zipper is damaged. For your information, there are several parts to a zipper: a notched slider, one or two stoppers, a slider, a pull tab and a tape. It is important to identify the damaged part, because not all of them can be repaired. In fact, if the zippers are missing notches, there will be no choice but to replace the entire zipper.
However, if the zipper pull is broken, the slider is worn, or the stopper has fallen off, it is not necessary to replace the entire mechanical zipper. Each of these parts is replaceable and will make your clothes look like new again.
Here is a picture that should easily help you identify the different elements that make them up:
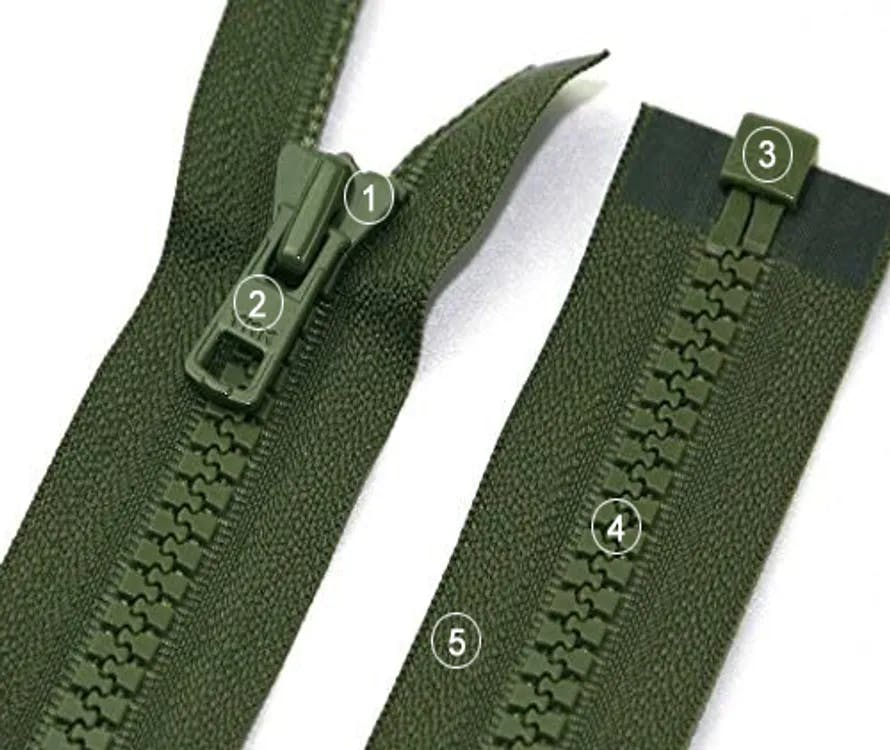 1 = cursor
2 = zipper pull
3 = stops
4 = slider
5 = band
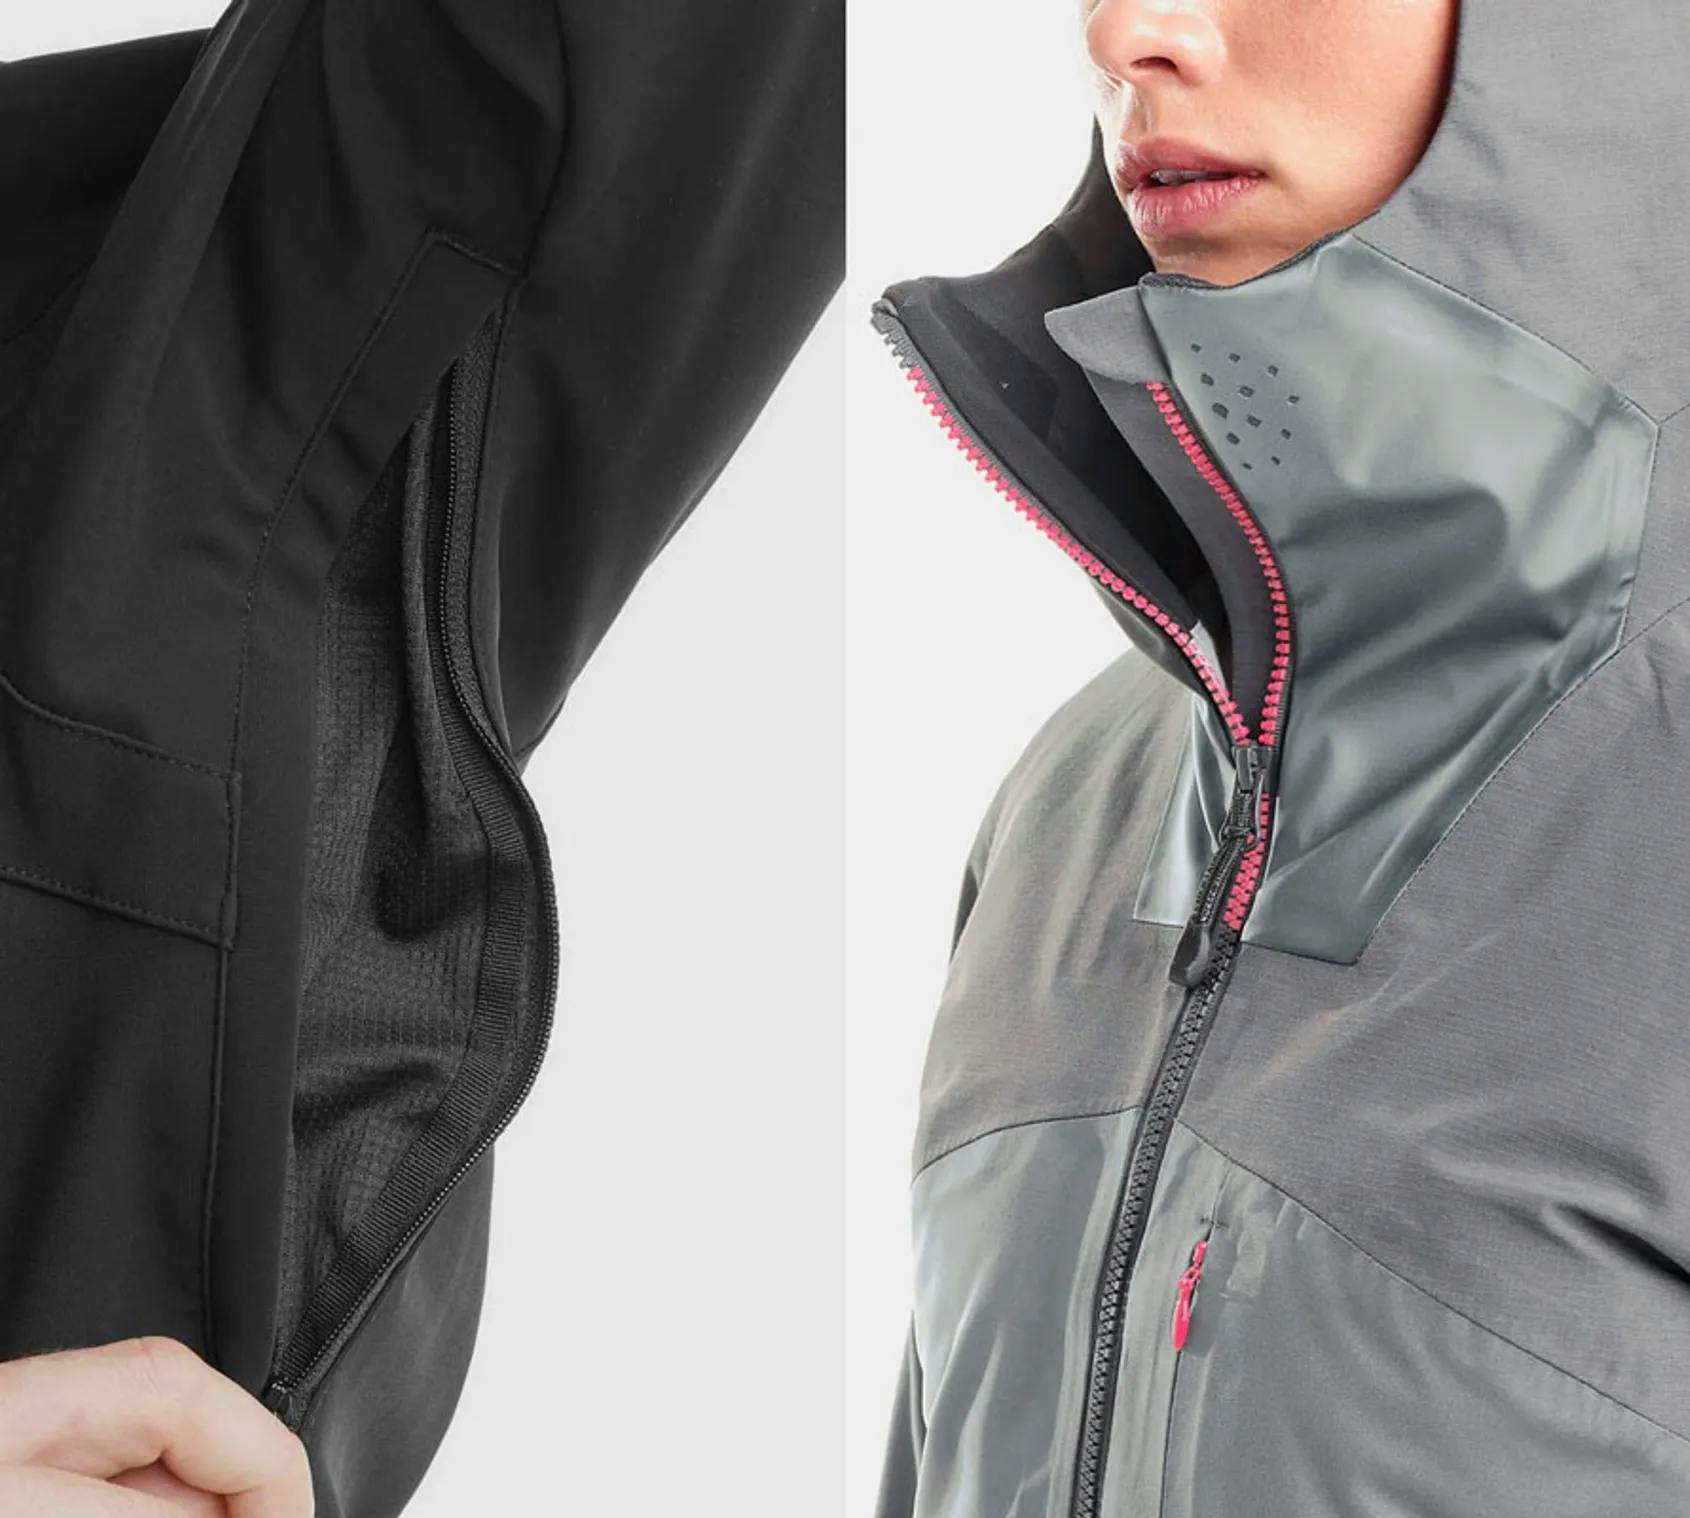
At Horse Pilot, we frequently use zippers for the fly of our pants, the openings of our jackets, down jackets, parkas; to open and close the underarm vents of our jackets, or to adapt the comfort of our coats on each side. Some of our clothes have two sliders: one at the top, the second at the bottom to adapt the opening to your comfort, without having to open the whole zipper.
We use YKK® zippers almost exclusively on our clothing. Created in Japan in 1934 by Tadao Yoshida (1908 -1993), YKK sells zippers that have quickly become the reference in the field. YKK stands for "Yoshida Kogyo Kabushikaisha" which is the equivalent of Yoshida SA. Like the zipper®, YKK is a registered trademark.
BROKEN ZIPPER PULL
HOW TO REPLACE A BROKEN ZIPPER PULL?
The good news is that this little part is repairable. To replace your zipper pull, you'll first need to buy one online or at a specialty store like haberdashery. Bring the original zipper pull to the store if you are not sure of the size.
Once you have your new pull tab, you can proceed with the repair. Remove the pull tab with pliers if you have not already done so. To do this, open the loop on the slider. It may be that it is in the shape of a hook, in this case, spread it slightly to be able to remove the pull tab.
Replace the broken zipper with the new one and carefully close the loop or hook of the slider with your pliers until the zipper is locked. You have a usable zipper again.
BACKUP SOLUTIONS FOR A BROKEN ZIPPER PULL
In an emergency, there are quick and effective solutions to change the zipper pull on your zipper. Remove the zipper pull as previously explained.
You can then use all sorts of objects to temporarily replace the zipper pull such as a paper clip, metal ring, wire or ribbon. These methods can be temporary, but they can also last for a long time.
BROKEN ZIPPER SLIDER
HOW TO REPAIR A ZIPPER SLIDER?
The slider may not need to be replaced, but simply repaired. The slider is often the reason why people look for ways to repair broken teeth on a zipper. Sometimes the teeth of the zipper do not close properly or there is a gap between the teeth.
In this case, it is often the slider that has become loose with wear. It is quite easy to repair the zipper slider.
Using pliers, you can gently tighten the edges of the slider. Check that the slider is repaired by sliding it down the slide. Repeat this process until the slider notches close easily.
REPLACE A BROKEN ZIPPER SLIDER
WHERE TO BUY A REPLACEMENT SLIDER?
If your slider is too damaged, it will need to be replaced. In this case, start by buying a slider online or at a haberdashery. You will also need a replacement slider that you will have to remove in order to install the new slider.
To do this, you will first need to determine the size of the slider that you will find on the back of your original slider. If you can't find this information, you can measure the width of the closed notches to determine it. As with the pull tab, bring the original slider to the store if you are unsure of the model.
You'll also want to make sure you buy a slider that is compatible with the type of zipper you have: plastic or metal. Finally, the shape of the notches should also be taken into account.
HOW TO REPLACE THE CURSOR?
Before replacing the slider you will need to remove the stop (and therefore add a new one). Then remove the defective slider by sliding it to the bottom of the slide towards the stop that you removed earlier.
Then insert the new slider from the bottom of the slide, making sure that it is right side up. You may have to force it over the old stop. All you have to do is replace the stop.
HOW TO REPLACE A BROKEN ZIPPER STOPPER?
For the aesthetic aspect, we advise you to choose a bumper of the same material as your old one: there are mainly plastic or metal ones.
You can replace the bottom bumper as well as the top one. Nothing could be easier. You just need to take a pair of pliers and cut the bumper while taking care not to damage the fabric. Remove the remaining pieces carefully.
If you have also replaced your slider, make sure it is positioned on the slide before putting in new bumpers. Place your new stop in place of the old one. If a notch on the slider broke off previously, place the bottom bumper on top and the top bumper underneath to exclude it. Finally, using pliers, tighten the stopper on the slide.
For any more complex repair or if you have any doubt please contact our after sales service via our form or directly by phone: +33 4 99 54 63 52
